Antifouling a yacht: A step-by-step guide
23 June 2025
One of the most important things you can do to maintain your yacht is to carry out antifouling when required. Without sufficient antifouling, you’ll find that your yacht is slower, more difficult to handle, and uses more fuel.
In this step-by-step guide, we discuss why this task is important, how to prepare your yacht, steps for painting your yacht, and some top tips to help you achieve the best results.
Why is antifouling important?
Antifouling boats is important as this unique paint protects your hull from marine life, such as barnacles and algae. Over time, these organisms can build up and slow your vessel down, make it harder to manoeuvre, and reduce fuel efficiency.
Typically, it’s an annual task, however, this can vary depending on how often your yacht is in the water. Sometimes a boat will only require it every few years. Signs that your yacht is due some work include flaking, blistered, or missing paint.
Preparing your yacht for antifouling
Before you start, there are some steps you should take to ensure the paint goes on smoothly and produces effective results.
1. Choose an appropriate location
It’s important to choose an appropriate location to help you stay safe. Working outside in a secure location away from people and animals is preferable. However, if you’re using a boatshed, ensure it’s well ventilated and go outside for frequent breaks. Aim to antifoul in the middle of the day to avoid damp air that can linger early in the mornings and evenings.
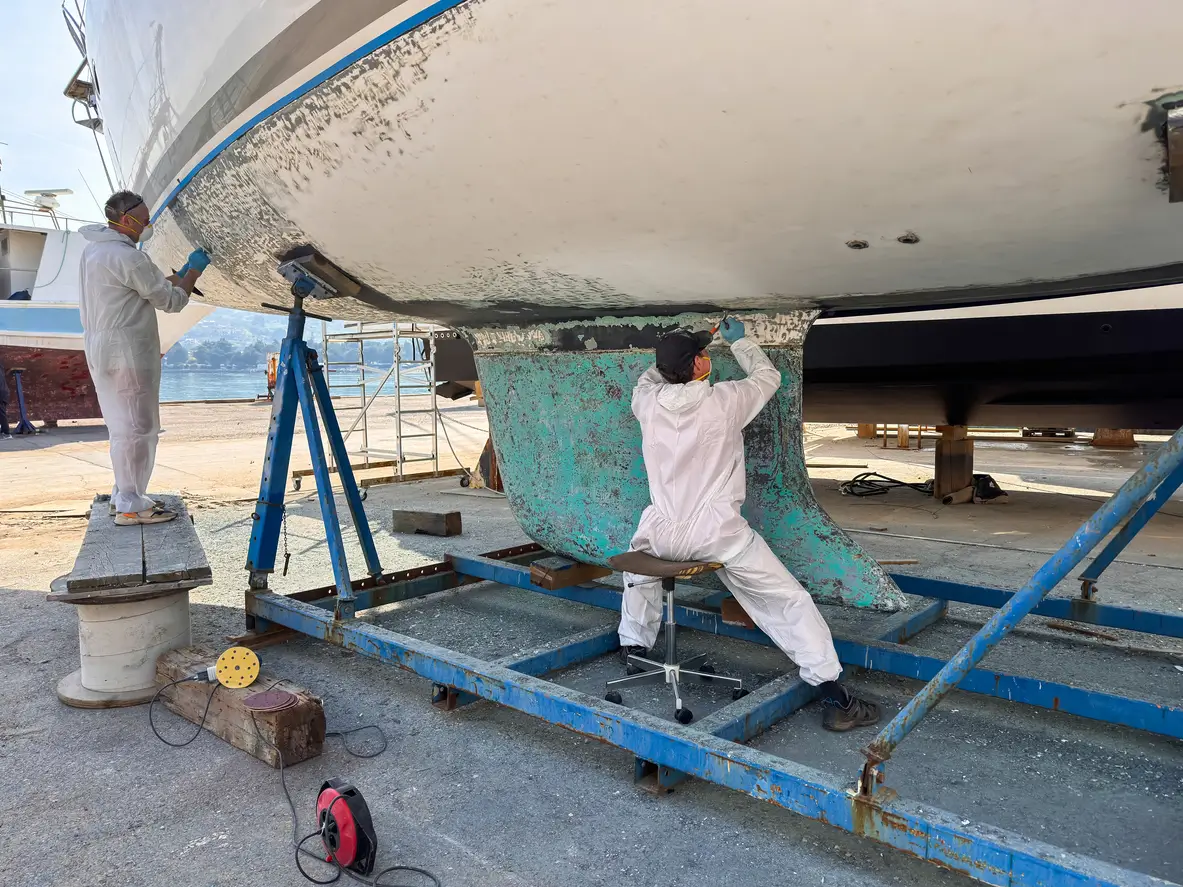
2. Wear PPE
Before you start the process, it’s important to put on PPE to protect yourself from fumes and debris. Wear overalls, eye protection, a high-quality mask and sturdy shoes. Make sure you cover your head and put on appropriate gloves. Try not to eat or drink during the process to avoid contamination.
3. Pressure wash
To prepare the surface of your yacht, use a pressure washer to clean the hull. Be sure to carry out this part of the process in a bunded area to contain particles and other substances. If a bunded area isn’t available, opt for portable bunding or tarpaulin.
4. Scraping and keying
Next, scrape any flaking or blistered antifoul from the hull to help create a smooth surface. Sharp edges can result in gouging, so round off the edges of your scraper before use. Keying the hull will help your antifoul paint to stick. To do this, wet sand the surface before rinsing with clean water. Keep an eye out for damage as you work your way around the hull and make a note of any issues that need addressing.
5. Wrap hull fittings
To protect hull fitting from the antifoul paint, wrap them in foil or tape them up.
6. Apply masking tape
To ensure a clean finish, use high-quality, waterproof masking tape to mask off the waterline. Using poor quality tape can mean paint or water seeps in and it may leave behind unsightly residue, so invest in a suitable option for the best results.
7. Patch prime
The last stage of preparing your yacht is patch priming. For this, apply primer or a barrier coat to any areas that need it to ensure the paint goes on smoothly.
Painting your yacht with antifoul
Now that you’ve prepared your yacht, it’s time to start painting. Take your time with each step and be patient to make sure you’re rewarded with excellent results.
1. Prepare your paint
Antifoul paint should be kept at room temperature before use to ensure it has the right consistency. Before opening the tin, cover the top with an old towel to protect you and your surroundings from potential splashes. Stir the paint thoroughly before pouring into a roller tray and replace the lid to prevent evaporation of solvents.
2. Grab your roller
The right paint roller will ensure a smooth antifoul application. Opt for a medium pile mohair or sheepskin roller for the best results as foam rollers disintegrate quickly and can slip, causing an uneven finish.
3. Start painting
Apply plenty of paint to your roller and aim for a dry film thickness (DFT) of around 60 microns. If you use a medium pile mohair or sheepskin roller as mentioned above, this should achieve the right DFT. You can use a wet film thickness gauge if you’d like to measure this during the process. A small paintbrush can be used for tricky areas, like around the waterline.
4. Remove the masking tape
Once you’ve applied the required number of coats (typically two or three depending on the paint), you can remove the masking tape from the waterline and the foil protection from your hull fittings. Remove the tape while the paint is tacky to achieve a clean line.
5. Clean up thoroughly
The final stage in the antifouling process is to clean up thoroughly. Tackle any large spillages with sand and then dispose of this as hazardous waste. All disposable PPE should also be put into relevant hazardous waste bins.
Antifouling tips checklist
- Ensure you have the correct PPE before you start
- Make sure you can dispose of waste, including contaminated water, safely and correctly
- Choose a dry day with low wind
- Check your yacht’s hull for damage as you remove the old antifoul paint
- Use high-quality waterproof masking tape to create a clean line
- Stir paint thoroughly to ensure all components are well combined
- Wrap clingfilm around your roller when not in use to prevent it from drying out
- If your skin comes into contact with antifoul paint, wash immediately with soap and warm water
Specialist boat insurance through GJW Direct
In addition to taking care of your yacht through antifouling when required, you may want to consider specialist boat insurance to cover you in the event of damage, theft, or a liability claim.
Find out more and arrange an online quote today.
Please note the information provided on this page should not be taken as advice and has been written as a matter of opinion. For more on insurance cover and policy wording, see our homepage.
Got a question? Call our UK call centre 0151 473 8000
GJWDirect is a
 Insurance Services product
©Copyright Ripe Thinking Limited 2026. GJWDirect® is a registered trademark and a trading name of Ripe Insurance Services Limited which is Authorised and Regulated by the Financial Conduct Authority No.313411.
Registered office: One Stockport Exchange, Railway Road, Stockport, United Kingdom, SK1 3SW. Registered in England No. 04507332.